Easy Way to Get New Amps in Warframe
Whether hunting the titanic Eidolons on Earth or lying low aboard a Grineer ship as the operator, the Amp is one of your most important tools (probably second only to the Warframes themselves). These wrist-mounted void cannons can help you get out of a pickle if you pick the right one for whatever you're doing.
Here are the best Amps in their own categories/uses.
Take note: there are currently 343 possible Amp combinations in the game, plus the 2 pre-built Amps (the Mote Amp and Sirocco), summing it up to 345 Amps. It's not that easy picking out the best ones out of all of these. So if you think there's a combination out there that should've been on this list, leave a comment down below! I'd love to hear from you.
Another note: if you don't understand how the naming of Amps works, they are named after the "series" of each part. For example, The Raplak Prism, Pencha Scaffold, and Clapkra Brace are all from series 1 and so an Amp that uses these parts will be named: 111.
To get a full list of Amp parts and what series they belong in, you can visit the Warframe Amp Wikia. But don't worry, I'll be listing each Amp's parts in the "Details" section of each entry.
10. (Best for beginners) 111

Tip: If you only have a Mote Amp, try to get this one as soon as you can.
The first Amp that'll be accessible to you after the Mote Amp. You may be thinking that you're better off just waiting until other parts become available but, the 111 Amp is leagues better than the default Mote Amp. It's highly advisable to get it as soon as you can, so you can actually see what this weapon type is capable of.
This Amp kind of acts like Iron Man's repulsor cannons, the main firing mode is a quick single shot while the secondary firing mode is a charged, stronger shot.
What this Amp excels at:
- Accessibility
Every part of this Amp belongs in series 1, all of which are made accessible from Mote rank in The Quills, which is the first rank up from Neutral. The parts are all sold cheap too. Each part can be bought for just 1,000 standing.
- Introducing you to Amps
Making this Amp will introduce you to the process of interacting with The Quills, buying and crafting the parts, putting the parts together, and seeing how they interact with each other, then gilding them once ranked up.
You'll also learn how crafter Amps work. Unlink the Mote Amp, other Amps have a secondary mode of firing, depending on what scaffold and Amp uses.
Details (Parts):
- Raplak Prism
Where to get: The Quills, at Mote Rank for 1,000 standing.
Firing mode: Semi-auto, single shot, high critical chance, and range.
- Pencha Scaffold
Where to get: The Quills, at Mote Rank for 1,000 standing.
Firing mode: Charged, single shot, high damage, high status chance.
- Clapkra Brace
Where to get: The Quills, at Mote Rank for 1,000 standing.
Effect: Increases Amp's max energy by 40.
9. (Best for fighting the Shadow Stalker) 234
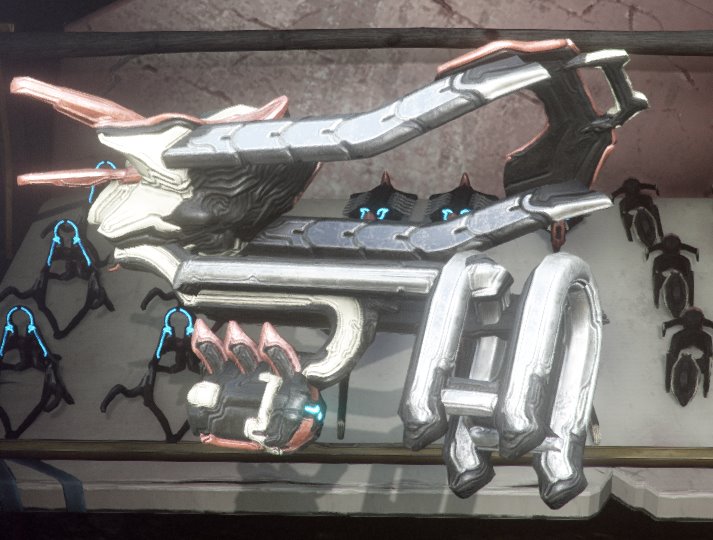
When pepper spray just won't do.
One of the first enemies you'll face where the Amp will come in useful (needed even). During your first encounters, you'll most likely be facing the stalker with the Mote Amp or the 111 Amp.
Now, admittedly, the Shadow Stalker pretty much becomes a push-over when you use Amps, regardless of which one you use. So this Amp is for those who just want to get rid of the Hunhow's lackey the quickest.
The Stalker can be a slippery target, he can stand still at one second and then be running circles around you in the next. That's what I considered for this one.
The Shwaak can let you get some licks in once he starts slowing down, and the Klebrik allows you to keep hitting him no matter how confusing his movements get. The Anspatha is there just to make sure you don't run out of juice while fighting him.
What this Amp excels at:
- Locking on to the Stalker
The Klebrik Scaffold's firing mode will latch on to the Stalker, allowing you to not only keep an eye on his position but also to be constantly dealing damage even while he's on the move.
- Taking down the Stalker quickly and consistently
The Shwaak deals huge damage and the best part is, you don't even have to aim well to use it. Just point in the general direction of the Stalker and let loose.
Details (Parts):
- Shwaak Prism
Where to get: The Quills, at Observer Rank for 1,500 standing.
Firing mode: Semi-auto, wide, shotgun-like blast, high base damage, and status chance, innate punch through on bodies.
- Klebrik Scaffold
Where to get: The Quills, at Adherent Rank for 2,000 standing.
Firing mode: Held, continuous homing beam, decent critical and status chance.
- Anspatha Brace
Where to get: The Quills, at Instrument Rank for 2,500 standing.
Effect: Increases Amp's max energy by 20, increases Amp and operator energy regeneration by 15%.
8. (Best for fighting Sentients) 527
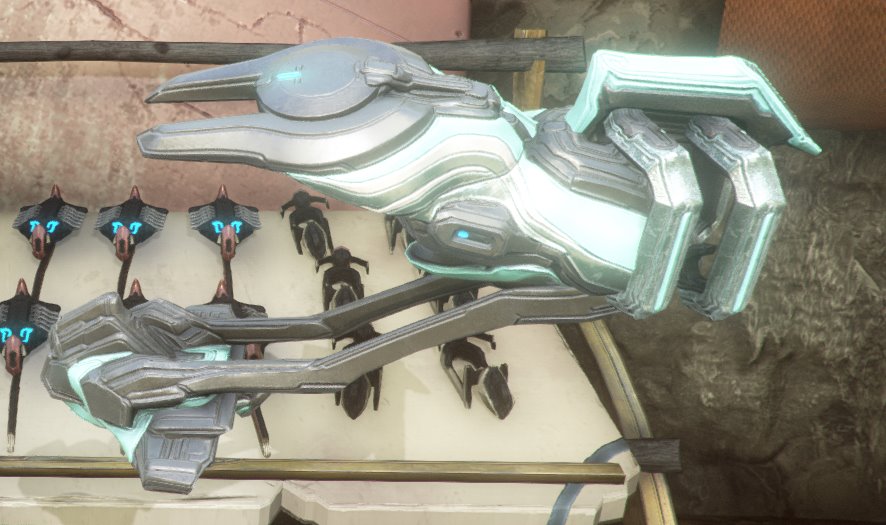
Send those sentients back to Ballas with this.
The first time you faced the Sentients in The Second Dream quest was a rough experience for a lot of players. Enemies that could adapt to most of the damage types you throw at them. Fortunately, there is a way to strip away their resistances: the Amp.
You won't really encounter these enemies a lot as they mostly only appear in certain quests and on Lua, but when you do, here's what'll help the most.
This Amp isn't just good for resetting sentient damage resistances, it's also good for just straight up dispatching them (up to a certain level, you might want to use your weapons against Steel Path sentients).
The burst fire can get rid of sentients quickly, if you find yourself against overwhelming numbers, you can use the alternate fire to deal damage to multiple enemies in front of you. (You could also go for 427 if you prefer an automatic weapon).
What this Amp excels at:
- Removing sentient resistances
Like all Amps, this one removes any existing built-up resistances a sentient foe has accumulated, allowing you to go back to your main weapons and deal max damage again.
- Both singular, and multiple threats
Use the Prism for singular targets and the Scaffold for bunched-up sentients.
Details (Parts):
- Cantic Prism
Where to get: Vox Solaris, at Agent Rank for 3,000 standing.
Firing mode: Burst, three-shot, high critical chance, and range.
- Shraksun Scaffold
Where to get: The Quills, at Observer Rank for 1,500 standing.
Firing mode: Semi-auto, explosive projectiles, high critical and status chance, innate punch through on bodies, has AOE.
- Certus Brace
Where to get: Vox Solaris, at Instrument Rank for 3,000 standing.
Effect: Adds 20% critical chance to both Amp firing modes.
7. (Best for Kuva Siphons/Floods) 664
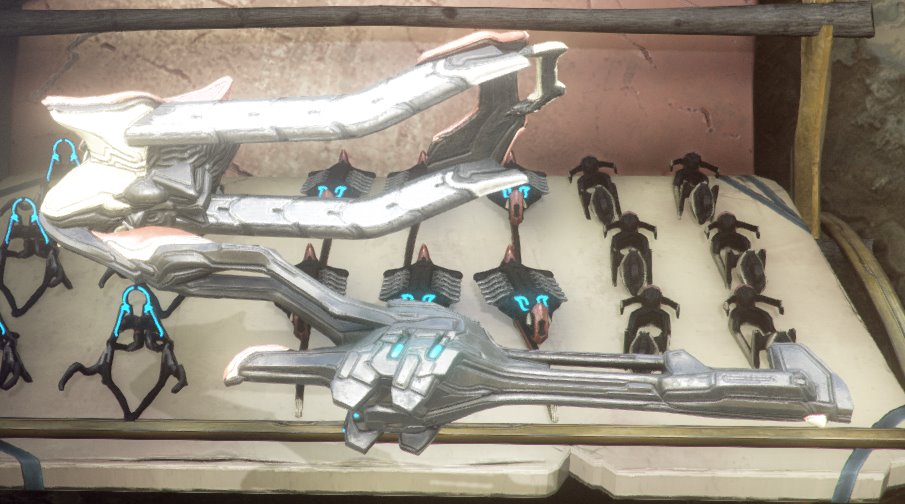
Farm that Riven fuel easier with this.
For those who want to follow in the footsteps of the Corpus and be successful businessmen in the Warframe universe, selling overpowered rivens is one of the fastest and most common ways of making it rain. And to get those said overpowered rivens, you need to do Kuva siphons.
To destroy Kuva clouds, you can either void dash through them, or shoot it with your Amp. Pretty much any Amp can do this as you only need to hit the cloud once to destroy it.
So this Amp is meant more for you to defend yourself or go on the offensive against incoming enemies while dealing with the Kuva machine and cloud.
What this Amp excels at:
- Dealing with Kuva Guardians
Once you've void dashed through these big boys, you can start melting them with your Lega Prism's beam, you'll take down enemies next to them too.
- Crowd control
Both firing modes can engulf large numbers of enemies in void damage, allowing you to push back waves of enemies as you wait for the next Kuva cloud to appear.
- Popping Kuva clouds quickly
Since both firing modes affect large areas, you only need to aim at the general direction of the Kuva cloud and fire to destroy it.
Details (Parts):
- Lega Prism
Where to get: Vox Solaris, at Hand Rank for 3,000 standing.
Firing mode: Held, continuous, wide void beam, high status chance.
- Dissic Scaffold
Where to get: Vox Solaris, at Hand Rank for 3,000 standing.
Firing mode: Semi-auto, cluster bomb, high status chance, large AOE.
- Anspatha Brace
Where to get: The Quills, at Instrument Rank for 2,500 standing.
Effect: Increases Amp's max energy by 20, increases Amp and operator energy regeneration by 15%.
6. (Best for fighting Vomvalysts) 625
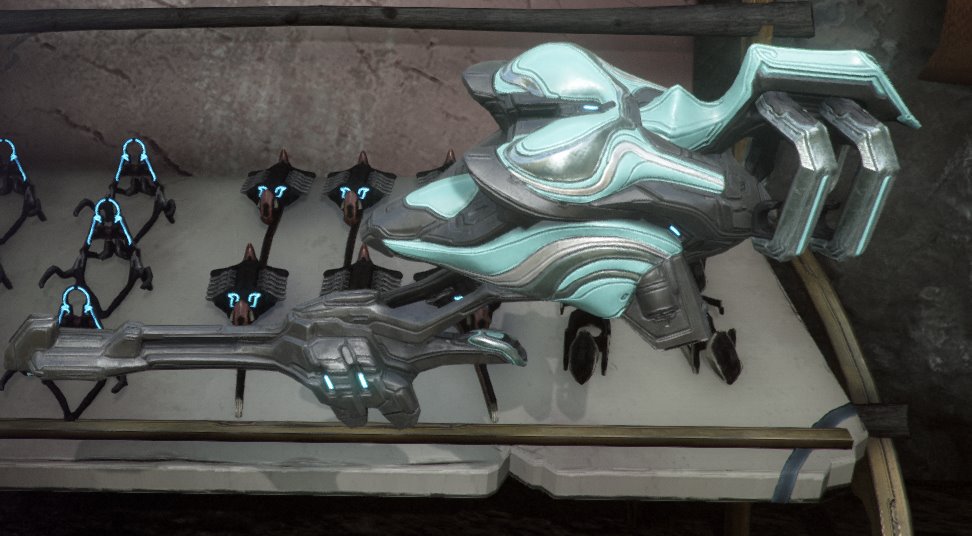
Explore the Plains at night in peace.
Sometimes you don't want to fight Eidolons and you just want to do other stuff in the Plains of Eidolon at night. Whether you want to fish, mine, preserve animals or do other bounties at night, the Vomvalyst presence is a constant annoyance at least, deadly force at most.
So what do you do? *slaps Amp* You put this baby on. This Amp is designed to evaporate any Vomvalysts that pop their ugly heads up during your visit to the plains.
As you've probably noticed, Vomvalysts tend to travel (and attack) in packs. There's never just one of these things. So what you need is something that can take on multiple targets at once. The Primary fire is a widespread void beam and the secondary fire is an explosive wave of void energy, perfect for the job.
What this Amp excels at:
- Handling tons of Vomvalysts
This Amp can handle multiple Vomvalysts approaching from multiple directions from a close to medium distance.
Details (Parts):
- Lega Prism
Where to get: Vox Solaris, at Hand Rank for 3,000 standing.
Firing mode: Held, continuous, wide void beam, high status chance.
- Shraksun Scaffold
Where to get: The Quills, at Observer Rank for 1,500 standing.
Firing mode: Semi-auto, explosive projectiles, high critical and status chance, innate punch through on bodies, has AOE.
- Suo Brace
Where to get: Vox Solaris, at Agent Rank for 3,000 standing.
Effect: Increases Amp max energy by 100, increases energy recharge delay by 2 seconds.
5. (Best for hunting Eidolons) 177
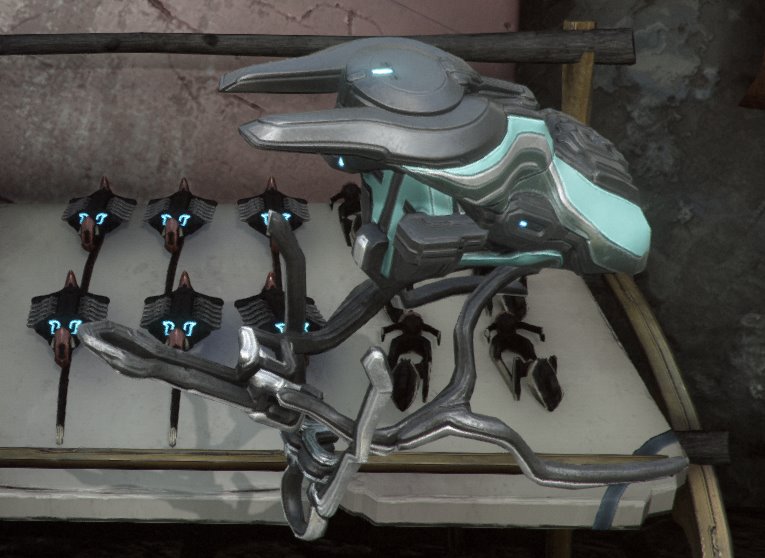
Eidolon hunts can get toxic. Best be prepared with this Amp.
The main purpose of the Amp. Possibly the main reason you're even reading this article. Some people tend to have conflicting opinions about what the meta Amp for Eidolon hunting is. Some prefer the 777, 223, and 627. In the end, it all comes down to personal taste and preference.
But the major consensus is that the best Amp for Eidolon hunting is the good ole 177. When paired with Volt's Electric Shield, the Virtuos Shadow Arcane, and Madurai's Void Strike, you can break an Eidolon's shields in one hit with the Propa Saffold if you score a critical hit. And when you don't get a critical hit, you can use the Raplak to take down whatever shields remain.
What this Amp excels at:
- One-shotting Eidolon Shields
As explained above, this Amp is used to rush Eidolon hunts by taking down their shields as fast as possible by maxing this Amp's critical capabilities.
- Killing Vomvalysts
You'll also be using the Raplak Prism for taking down Vomvalysts to charge up the Eidolon lures. You can also use the Propa but it's much trickier because you'd need to time your shots right to hit them.
Details (Parts):
- Raplak Prism
Where to get: The Quills, at Mote Rank for 1,000 standing.
Firing mode: Semi-auto, single shot, high critical chance, and range.
- Propa Scaffold
Where to get: Vox Solaris, at Instrument Rank for 3,000 standing.
Firing mode: Semi-auto, single grenade, high critical chance, has big AOE
- Certus Brace
Where to get: Vox Solaris, at Instrument Rank for 3,000 standing.
Effect: Adds 20% critical chance to both Amp firing modes.
4. (Best for fighting Profit-Taker) 147
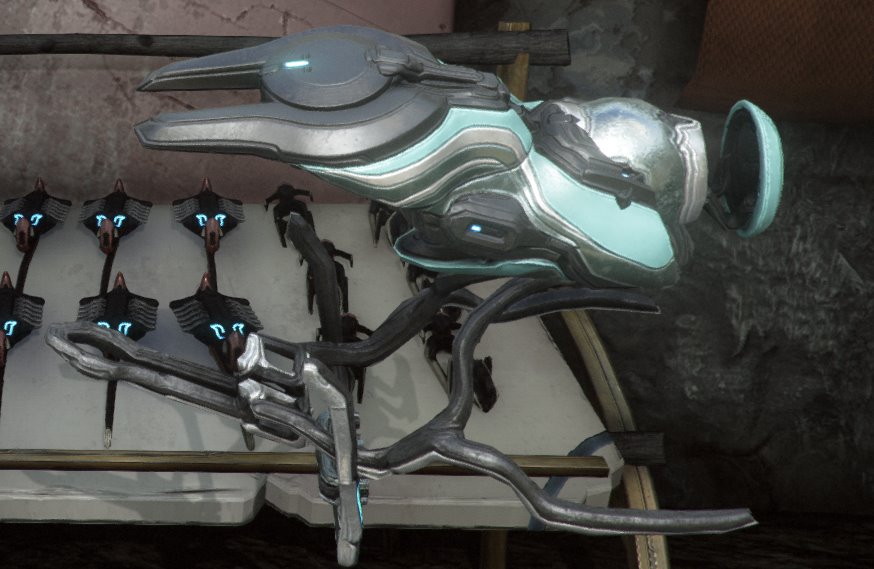
Step 1: fight profit taker, Step 2: ???, Step 3: profit.
Another open-world boss that requires the Amp. Though less popular than Eidolons, you're going to have to take on the Profit-Taker Orb if you want to quickly climb up the ranks of Vox Solaris.
I'll mostly talk about the parts that the Amp will be used for. If you want a full walkthrough of how to beat the Profit-Taker, here's a video.
Compared with Eidolon hunts, the Amp plays a smaller role in fighting the Profit-Taker, it's mainly used to just cycle through the Orb's damage resistances until you get the damage type you want. Basically, any Amp can do this but the Raplak Prism is preferred due to its accuracy and effectiveness at long ranges.
What this Amp excels at:
- Switch Profit-Taker's shield weakness type
To do this, simply fire at the Profit-Taker with the Raplak prism. This switches the damage type that it's currently weak to. Just keep firing until you hit the element you've built your loadout around.
- Destroying shield pylons
You can simply destroy these with your regular weapons but one of the reasons this Amp is the best for this situation is that the Phahd scaffold can get rid of the shield pylons easily too.
Details (Parts):
- Raplak Prism
Where to get: The Quills, at Mote Rank for 1,000 standing.
Firing mode: Semi-auto, single shot, high critical chance, and range.
- Phahd Scaffold
Where to get: The Quills, at Instrument Rank for 2,000 standing.
Firing mode: Semi-auto, ricocheting, homing void glaive, high critical chance, deals AOE after each bounce.
- Certus Brace
Where to get: Vox Solaris, at Instrument Rank for 3,000 standing.
Effect: Adds 20% critical chance to both Amp firing modes.
3. (Best for raw damage) 377
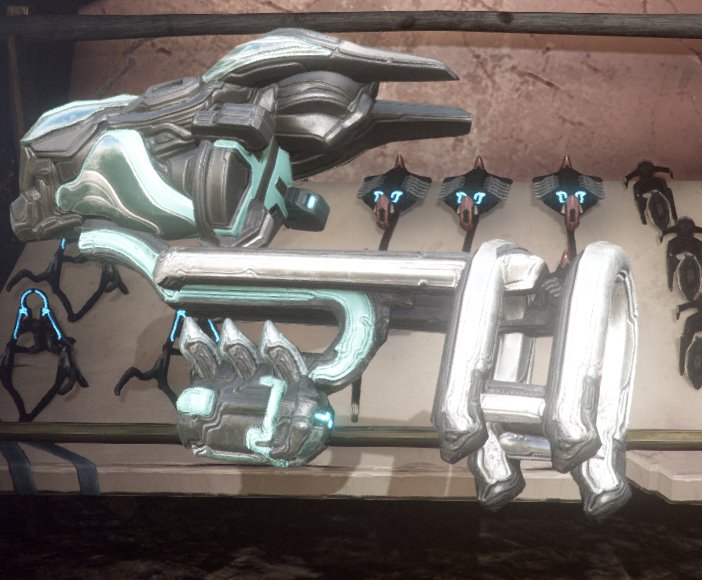
Maximize the pain with this Amp.
Maybe you're one of those players that don't really care about all these details and complicated build strategies. Maybe all you want is to see really big numbers every time you push on your left or middle mouse button.
Then this is the Amp for you. The Granmu Prism fires 3 grenades, each dealing 1,000 void damage for the impact, and 1,400 void damage for the explosion. Summing it all up to 7,200 void damage every time you pull the trigger (assuming every shot hits).
The Propa Scaffold is the single highest base-damage Amp component in the game. It deals a massive 9,000 void damage for every grenade.
The Certus enhances both of these parts by adding a flat 20% critical chance for both of them.
What this Amp excels at:
- Crowd control
Since both firing modes are essentially grenade launchers, watch the enemy numbers dwindle as you blow up their ranks. (Just remember to put a little distance between you and your targets so you don't keep self-staggering yourself with your grenades)
- Raw, unadulterated damage
That's what you wanted this for right? There really isn't much else to say about this Amp aside from it brings the big ouchies.
Details (Parts):
- Granmu Prism
Where to get: The Quills, at Adherent Rank for 2,000 standing.
Firing mode: Burst, three-shot grenade, high critical chance, has big AOE
- Propa Scaffold
Where to get: Vox Solaris, at Instrument Rank for 3,000 standing.
Firing mode: Semi-auto, single grenade, high critical chance, has big AOE
- Certus Brace
Where to get: Vox Solaris, at Instrument Rank for 3,000 standing.
Effect: Adds 20% critical chance to both Amp firing modes.
2. (Best for criticals) 747
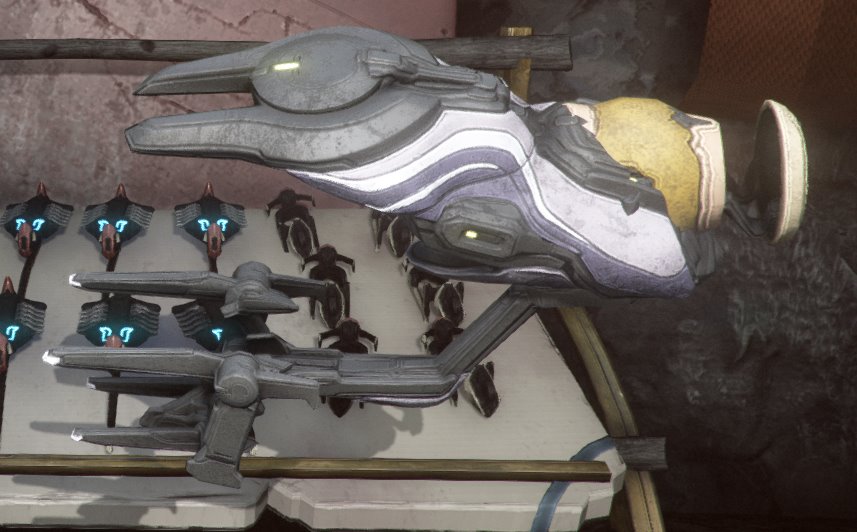
For those that want those sweet yellow numbers.
Unlike other weapons, the Amp can't be modded. So don't expect to see red numbers with even the best Amps unless they make a major change. You can also enhance your criticals through other means (like for the 177 in Eidolon hunting).
Enhancements aside, this is the Amp with the highest base critical chance in the games. No buts and ifs about it.
What this Amp excels at:
- Dealing crits
The Klamora has a critical chance of 38% and a critical multiplier of 2.4x, and the Phahd has a critical chance and multiplier of 34% and 2.6x respectively (this is for both the impact and explosion of the glaive). The Certus Brace further boosts these numbers to 58% and 54% making this Amp a critical spewing machine!
Details (Parts):
- Klamora Prism
Where to get: Vox Solaris, at Instrument Rank for 3,000 standing.
Firing mode: Held, wide beam, short-range, high critical chance, has big AOE
- Phahd Scaffold
Where to get: The Quills, at Instrument Rank for 2,000 standing.
Firing mode: Semi-auto, ricocheting, homing void glaive, high critical chance, deals AOE after each bounce.
- Certus Brace
Where to get: Vox Solaris, at Instrument Rank for 3,000 standing.
Effect: Adds 20% critical chance to both Amp firing modes.
1. (Best for status effect) 653
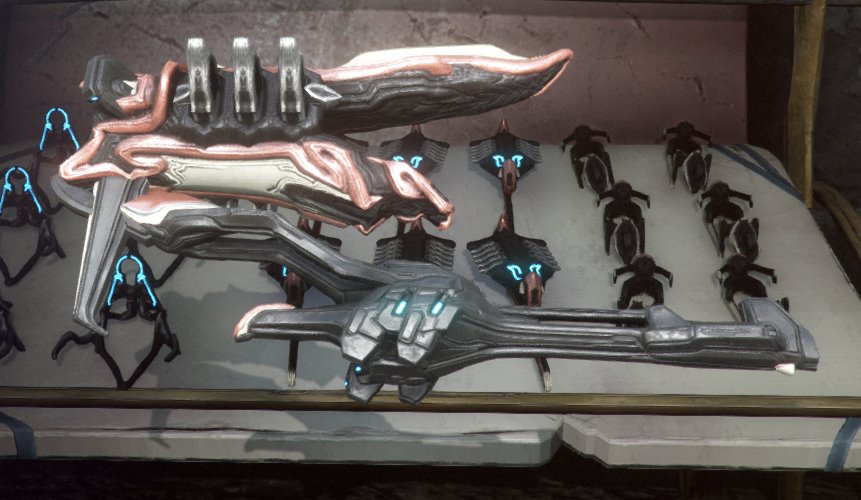
The Void status effect king.
All Amps deal Void Damage, the status effect that Void damage has is a bullet attractor (similar to Mag's 2nd skill except it doesn't pull other enemies toward it). This can be useful for fast -moving targets you can't be bothered to properly hunt down.
In which case, this Amp comes in handy as its components have the highest status chance out of all Amps.
What this Amp excels at:
- Dealing status effects
The Lega has a status chance of 34%, while the Exard has 33% (for both grenade impact and explosion). The Lohrin Brace boosts this to 46% and 45% respectively. Making this Amp ideal for whenever you want to make use of the Void damage's bullet attractors.
Details (Parts):
- Lega Prism
Where to get: Vox Solaris, at Hand Rank for 3,000 standing.
Firing mode: Held, continuous, wide void beam, high status chance.
- Exard Scaffold
Where to get: Vox Solaris, at Agent Rank for 3,000 standing.
Firing mode: Burst, continuous grenade barrage, high critical and status chance, grenades have AOE.
- Lohrin Brace
Where to get: The Quills, at Adherent Rank for 2,000 standing.
Effect: Adds 12% critical chance and status chance to both Amp firing modes.
You May Also Be Interested In:
- Warframe: Best Warframes, Ranked Weakest To Strongest (Warframe Tier List)
- Top 10 Warframe Best Primary Weapons (And How to Get Them)
- [Top 5] Warframe Best Arch-guns And How To Get Them
- [Top 5] Warframe Best Melee Weapons And How To Get Them
- [Top 5] Warframe Best Kuva Weapons And How To Get Them
- [Top 11] Warframe Best Weapons And How To Get Them
- Top 10 Best Warframe Companions
- Top 5 Warframe Best Archwings
- Warframe Guide: Top 100 Tips, Tricks, and Strategies
- Top 3 Warframe Best Sniper Rifles and How To Get Them
- Top 5 Warframe Best Bows and How to Get Them
- Warframe: Top 10 Best Secondary Weapons That Rock Hard!
- Warframe: Best Melee Weapons (Top 5) And How To Get Them
- Warframe Best AMP for Every Activity
- Warframe: Best Kitgun Builds For Every Activity
bradfieldtoll1973.blogspot.com
Source: https://www.gamersdecide.com/articles/warframe-best-amp